
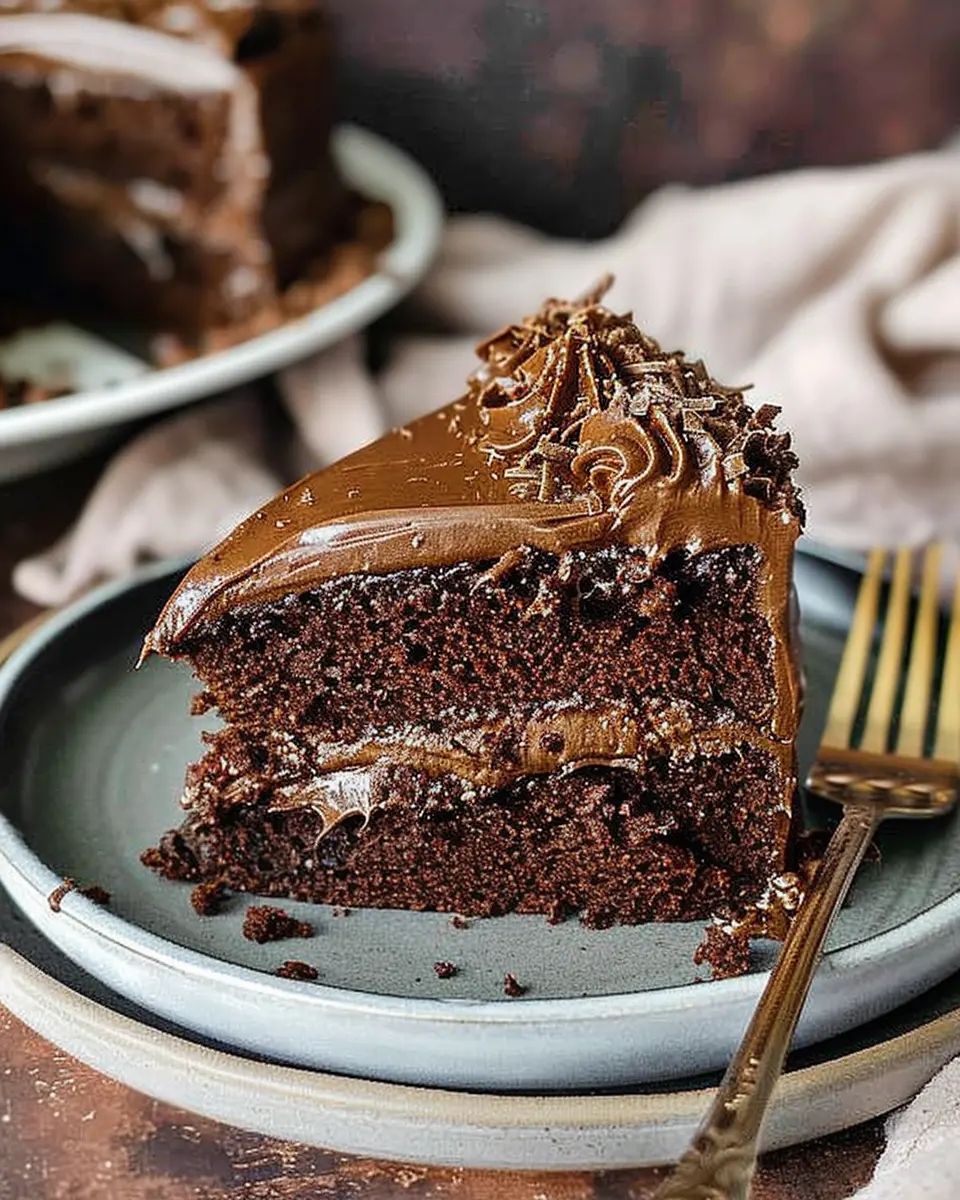
Introduction to Miss Trunchbull’s Chocolate Cake
When you hear the words chocolate cake, what comes to mind? For many young professionals, it’s likely memories of childhood, birthdays, and the sweet taste of carefree days. Today, we're diving into the whimsical world of Miss Trunchbull’s Chocolate Cake from Roald Dahl's beloved story, Matilda. This recipe isn’t just about baking; it’s about tapping into those nostalgic feelings, infusing your kitchen with warmth, and creating a delightful treat that’s perfect for a little indulgence after a long week at work.
A Nostalgic Treat for Young Professionals
Imagine coming home after a challenging day, the weight of deadlines on your shoulders. The brilliant thing about learning how to make Miss Trunchbull’s Chocolate Cake is that it allows you to escape into a simpler time. Roald Dahl's storytelling captured the imagination of generations, and his whimsical characters spark a sense of adventure and curiosity. By recreating this delightful cake, you’re not just making dessert; you’re crafting a moment of joy.
Why choose this cake?
- Rich Flavor: The decadent chocolate layers provide a wonderful contrast to the sweetness that you find in everyday desserts.
- Simple Ingredients: With basic pantry staples like flour, sugar, and cocoa powder, this cake is easy to whip up any day of the week.
- Perfect for Sharing: Whether it's a dinner party or a cozy get-together with friends, a slice of this cake can be the star of the evening.
As young professionals, nurturing a work-life balance can be challenging. But taking time out to bake this enchanting cake can serve as a mindful practice, allowing you to unplug for a while. Plus, if you’re eager to impress friends or family, a homemade chocolate cake is always a hit!
For further inspiration, check out this article on the benefits of baking for stress relief, which beautifully illustrates how engaging in baking can enhance mental well-being.
Baking this cake not only honors a classic story but also celebrates the magic of simple pleasures. So grab your apron—let’s find out how to make Miss Trunchbull’s Chocolate Cake together!
Ingredients for Miss Trunchbull’s Chocolate Cake
Baking Miss Trunchbull’s Chocolate Cake will instantly transport you back to the whimsical world of Matilda. Here’s a breakdown of the essential ingredients you'll need to conjure up this delicious treat!
Essential Ingredients for the Cake
- 2 cups all-purpose flour
- 2 cups granulated sugar
- ¾ cup unsweetened cocoa powder
- 1 ½ teaspoon baking soda
- 1 teaspoon baking powder
- 1 teaspoon salt
- 1 cup buttermilk
- ½ cup vegetable oil
- 2 large eggs
- 2 teaspoon vanilla extract
- 1 cup steaming hot water
Cookie’s Brown Butter Fudge Frosting Ingredients
- 1 cup unsalted butter (brown until nutty)
- 3 ½ cups powdered sugar
- ½ cup unsweetened cocoa powder
- ⅓ cup milk
- 1 teaspoon vanilla extract
Bruce’s Chocolate Mousse Filling Ingredients
- 1 ½ cups heavy cream
- 8 oz semisweet chocolate, chopped
- 3 large eggs, separated
- ¼ cup sugar
- Pinch of salt
Hot Chocolate Cake Soak Ingredients
- 1 cup hot chocolate (homemade or from a mix)
- 2 tablespoon granulated sugar
Getting all these ingredients together is the first step toward mastering how to make Miss Trunchbull’s Chocolate Cake. Prepare your pantry, and let the fun begin! For further inspiration, check out this baking guide to dive deeper into chocolate desserts.
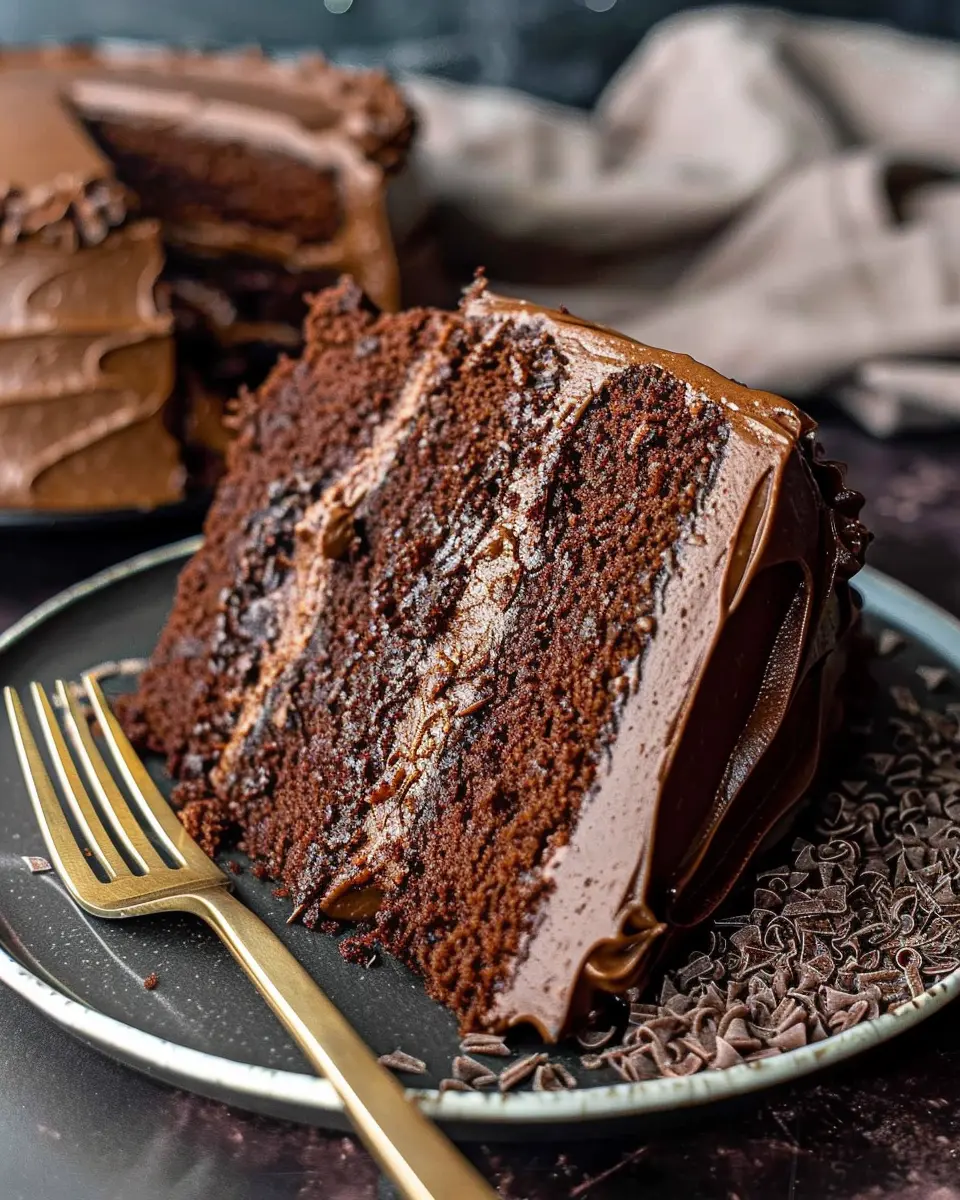
Step-by-step Preparation of Miss Trunchbull’s Chocolate Cake
If you're looking to impress your friends with an unforgettable dessert reminiscent of Miss Trunchbull from Matilda, then you’ve come to the right place! This chocolate cake is rich, decadent, and absolutely irresistible. Here’s how to make Miss Trunchbull’s Chocolate Cake step-by-step.
Prep and Preheat
Start by preparing your workspace. You want to set everything up for a delightful baking experience.
- Preheat your oven to 350°F (175°C).
- Prepare two 9-inch round cake pans by greasing them with butter and lightly dusting them with flour. This will help your cake come out of the pans easily without sticking.
Start the Mousse
The mousse is a key part of this cake, adding that extra layer of richness.
- In a medium saucepan, heat 1 cup of heavy cream over medium heat until it’s just beginning to simmer.
- Remove it from the heat and stir in 8 ounces of chopped semi-sweet chocolate until the chocolate is completely melted.
This combination is pure magic! Let it cool while you prepare the other components of the cake.
Add the Chocolate
To ensure that your mousse has a lovely consistency, it's essential to work with the right chocolate. Choose high-quality chocolate like Ghirardelli or Callebaut for the best flavor.
- Once the chocolate is melted and slightly cooled, set it aside.
Whip and Fold
Next, you want to whip the cream until soft peaks form.
- Using a mixing bowl, beat another 1 cup of heavy cream until it reaches that dreamy, billowy texture.
- Gently fold the whipped cream into the cooled chocolate mixture. This technique helps incorporate air, which makes your mousse light and fluffy.
Begin the Cake
Now it’s time to make the actual cake!
- In a large mixing bowl, combine 1 ¾ cups of all-purpose flour, 2 cups of granulated sugar, and ¾ cup of unsweetened cocoa powder.
Mix It Up
Here comes the fun part—bringing all the ingredients together!
- To the dry ingredients, add 1 ½ teaspoons of baking powder, 1 ½ teaspoons of baking soda, and 1 teaspoon of salt.
- Next, pour in 1 cup of whole milk, ½ cup of vegetable oil, and 2 large eggs.
- Mix on medium speed until well combined. This batter should be smooth, with a delightful aroma wafting through your kitchen.
Bake
Pour the batter evenly into the prepared cake pans.
- Bake for 30 to 35 minutes, or until a toothpick inserted in the center comes out clean. When you take them out, allow the cakes to cool in the pans for about 10 minutes before transferring them to a wire rack to cool completely.
Start the Frosting
While the cake cools, you can prepare a rich chocolate frosting that will complement the cake beautifully.
- In a bowl, beat together 1 cup of softened butter and 3 ½ cups of powdered sugar. Add in the remaining chocolate ganache you made earlier.
- Mix until velvety and smooth.
Combine and Cool
Once the cake layers have cooled completely, it's time to stack them!
- Place one layer on your serving plate and spread a generous amount of mousse on top.
- Add the second layer and then cover the entire cake with frosting, smoothing it out to create a gorgeous finish.
Layer the Cake
Feel free to get creative with how you layer your cake!
- You might want to add some more mousse between the layers or even sprinkle some chocolate shavings on top for that extra wow factor!
Frost and Devour
Finally, it’s time for the best part—frosting and devouring!
- Make sure to coat the sides and top of the cake with frosting. Decorate as you desire; perhaps some sprigs of mint or edible flowers to bring it to life.
Once it’s all done, slice into your masterpiece and enjoy. This cake is sure to bring smiles and happy memories for any occasion. Happy baking!
Variations on Miss Trunchbull’s Chocolate Cake
Gluten-free Adaptations
Want to learn how to make Miss Trunchbull’s Chocolate Cake gluten-free? It's easier than you might think! Simply swap all-purpose flour for a gluten-free blend. Look for a mix that includes xanthan gum; this will help mimic the texture of traditional flour, giving your cake that deliciously fluffy consistency.
- Flour Substitute: Use 1:1 gluten-free flour blend.
- Additional Options: If you're feeling adventurous, try almond flour or coconut flour. Just be mindful that you'll need to adjust the liquid content for these options.
Not only is this a fantastic alternative, but it also ensures that those with gluten sensitivities can join in on the fun! You can read more about gluten-free cooking here.
Vegan Version
Craving a slice but need a vegan option? Learning how to make Miss Trunchbull’s Chocolate Cake while keeping it plant-based is totally achievable! You can substitute eggs with flaxseed meal or applesauce, which works wonders for binding.
- Egg Replacement: Mix 1 tablespoon of flaxseed meal with 2.5 tablespoons of water for each egg.
- Dairy Alternatives: Use almond milk or coconut milk in place of regular milk.
This flavorful tweak adds moisture and a hint of nutty richness that everyone will love, even non-vegans! For a deeper dive into vegan baking, check out this helpful resource.
There you have it—two delightful variations on this classic cake! So whether you're baking for someone with dietary restrictions or just want to explore new flavors, these adaptations ensure that Miss Trunchbull's rich chocolate cake can be enjoyed by all. Happy baking!
Cooking Tips and Notes for Miss Trunchbull’s Chocolate Cake
Ensuring moisture and fluffiness
To truly master how to make Miss Trunchbull’s Chocolate Cake, achieving that perfect balance of moisture and fluffiness is crucial. Start by using room temperature ingredients; this helps in creating a uniform mixture. Don’t skip the eggs; they not only add richness but also trap air during mixing, giving your cake a light texture. Incorporate some sour cream or yogurt into your batter. These ingredients are fantastic for locking in moisture, making your cake irresistibly tender.
Expert advice on frosting techniques
Frosting can make or break your cake! For a smooth and professional finish, ensure the cake layers are cooled completely before frosting to avoid melting your delicious chocolate frosting. Use a crumb coat—a thin layer of frosting to seal in crumbs—then chill it for a bit before applying your final coat. This simple technique can elevate your cake’s presentation. Remember, practice makes perfect, so don’t be discouraged if it doesn’t look like a bakery display on your first try!
For more detailed frosting techniques, check out this frosting guide from The Spruce Eats.
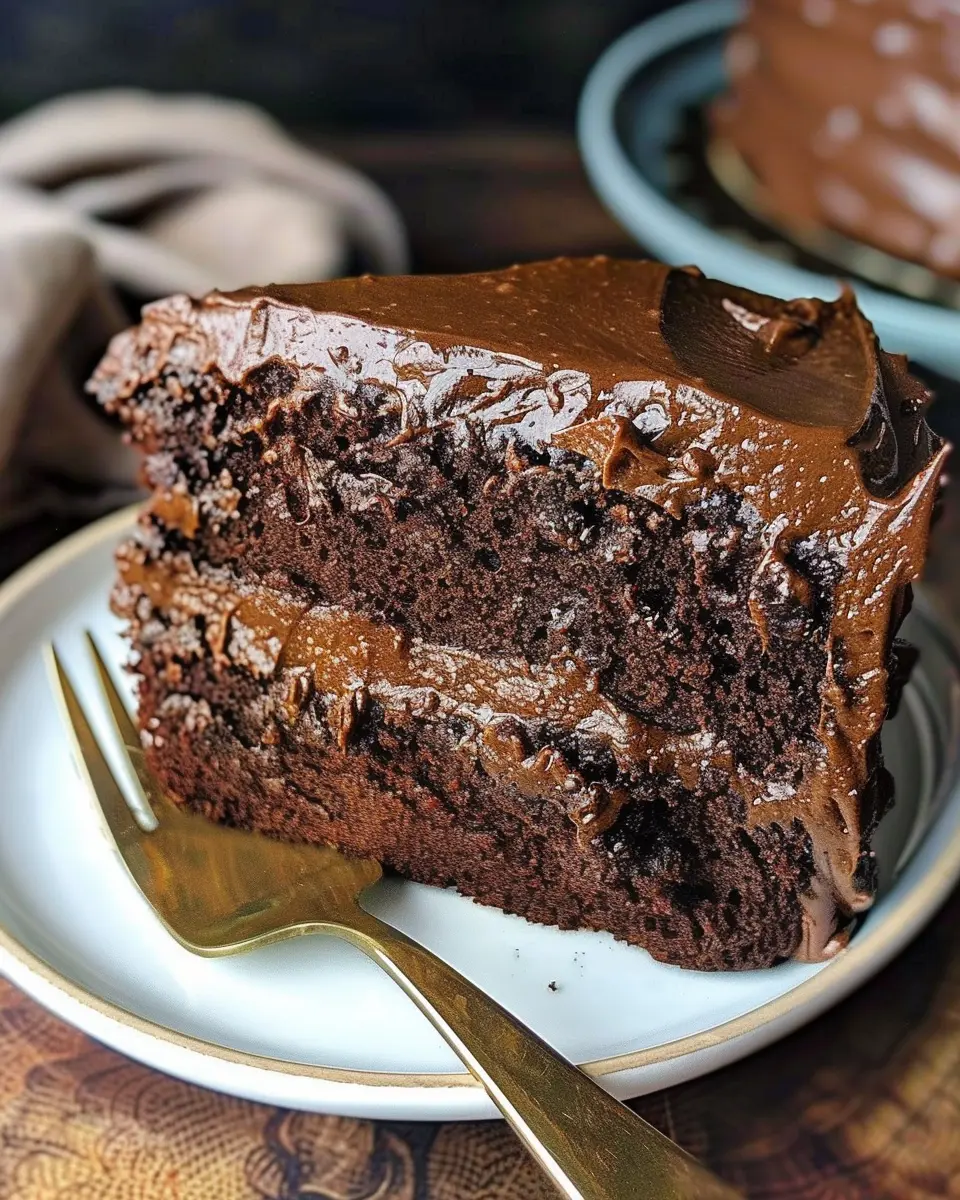
Serving Suggestions for Miss Trunchbull’s Chocolate Cake
Ideal Accompaniments
When you’re thinking about how to make Miss Trunchbull’s Chocolate Cake unforgettable, consider pairing it with some classic sides that harmonize beautifully. A dollop of freshly whipped cream adds a luxurious touch, while a scoop of vanilla ice cream provides a cool contrast that can balance the cake's richness. For a bit of fruitiness, serve it alongside fresh berries—how about strawberries or raspberries?
Also, if you're looking to amp up the flavor, a drizzle of chocolate sauce or caramel can take the experience to the next level, appealing not just to your taste buds, but also to the eyes.
Presenting the Cake at Gatherings
Presenting your cake is just as important as the taste. Imagine placing the cake on a beautiful cake stand, surrounded by candles and fresh flowers. This setup can brighten up any gathering and create a warm atmosphere. Consider cutting the cake into generous slices and placing them on elegant plates for your guests. Adding a small fork and a napkin on the side can elevate the experience.
To impress your friends even more, share the story of how you learned how to make Miss Trunchbull’s Chocolate Cake—it's a conversation starter that opens the door to childhood memories and nostalgia. For serving ideas, check out this guide for more inspiration!
By thoughtfully considering these small touches, you can ensure that both the flavor and presentation of Miss Trunchbull’s cake leave a lasting impression.
Time Breakdown for Making Miss Trunchbull’s Chocolate Cake
Preparation Time
Getting started on how to make Miss Trunchbull’s Chocolate Cake is half the fun! You'll need about 20 minutes to gather all your ingredients and prepare your baking pans. Make sure everything is at room temperature for that perfect texture. I recommend laying everything out so you can mix and match without a hitch!
Baking Time
Once your cake batter is ready to go, pop it in the oven for approximately 30 to 35 minutes. The aroma of rich chocolate filling your kitchen will be irresistible! Remember to do the toothpick test—insert it into the center, and it should come out clean when the cake is done.
Total Time
In total, you’re looking at roughly 60 to 70 minutes from start to finish. This includes prep and baking time, making it a perfect option for a weekend treat! Just imagine how impressed your friends and family will be when you surprise them with this decadent delight. For more cake-making tips, check out resources on The Kitchn or BBC Good Food.
Nutritional Facts for Miss Trunchbull’s Chocolate Cake
When indulging in Miss Trunchbull’s Chocolate Cake, it’s essential to know what you're savoring. Here’s a quick rundown of its nutritional profile:
Calories
One slice has approximately 350-400 calories. While it’s a delightful treat, moderation is key to enjoying this classic without compromising your health goals.
Protein
This cake packs in around 5-7 grams of protein per slice, largely from the eggs and milk used in the recipe. It’s not just a dessert; it adds a little nutrient value to your indulgence!
Sugar Content
Be prepared for a sweet experience! Each slice contains about 30-35 grams of sugar, which gives that rich, chocolaty flavor. For a balanced approach, consider pairing it with some fruit or a nice cup of coffee to offset the sweetness.
For anyone curious about how to make Miss Trunchbull’s Chocolate Cake, remember that enjoying this dessert doesn't have to be guilt-ridden—it can definitely be part of a balanced lifestyle. Looking for more on nutritional content? Check out resources from the USDA Food Data to learn more about ingredient compositions.
FAQ about Miss Trunchbull’s Chocolate Cake
How can I ensure my cake is moist?
To ensure your cake remains perfectly moist, consider a few key tricks. First, avoid overmixing your batter; this can make the cake dense. Incorporate ingredients gently for that tender crumb. Secondly, use high-quality ingredients—fresh eggs and good cocoa powder make a notable difference. Adding a bit of sour cream or Greek yogurt can add moisture and richness, which is essential when learning how to make Miss Trunchbull’s Chocolate Cake. Finally, don’t forget to keep an eye on your baking time. Removing the cake from the oven just before it’s fully baked can help retain moisture, as it will continue to cook slightly while cooling.
What’s the best way to store leftover cake?
To keep that delectable chocolate goodness fresh, store your leftover cake properly. Wrap it tightly in plastic wrap or place it in an airtight container. This helps maintain the cake's moist texture. For longer storage, consider freezing individual slices. Just make sure to wrap them well to avoid freezer burn. Here’s a quick tip: placing a slice between two sheets of parchment paper helps keep it from sticking together when thawing. If you want to learn more about preserving baked goods, check out this resource on food storage tips.
Can I use alternative sweeteners?
Absolutely! If you’re looking to make a lighter version of Miss Trunchbull’s Chocolate Cake, consider using alternative sweeteners like honey, maple syrup, or a sugar substitute like stevia or erythritol. Just be mindful that they might alter the texture slightly, so you may need to adjust the ratios. Always refer to conversion guidelines for accurate measurements, as substituting sweeteners can sometimes require additional tweaks to your recipe.
Remember, the goal is to enjoy your cake guilt-free while still savoring that iconic chocolate flavor! If you have any additional questions, feel free to share in the comments!
Conclusion on Miss Trunchbull’s Chocolate Cake
Embracing Homemade Goodness
In the quest to make Miss Trunchbull’s Chocolate Cake, we discover the joy of creating something delicious with our own hands. There’s an undeniable charm in baking from scratch, transforming simple ingredients into a decadent treat. It’s not just about the flavors; it’s the experience.
Baking can be an act of love, bringing friends and family together around something sweet. So, don’t shy away from experimenting and making this cake your own! Whether it’s adding a personal touch with toppings or tweaking ingredients for dietary preferences, the sky is the limit. Plus, it’s a great skill to share; check out expert baking tips from sources like King Arthur Baking to enhance your techniques!
So, roll up your sleeves and indulge in this rich and fudgy delight—your taste buds will thank you!

Leave a Reply