
Introduction to Turtle Bars
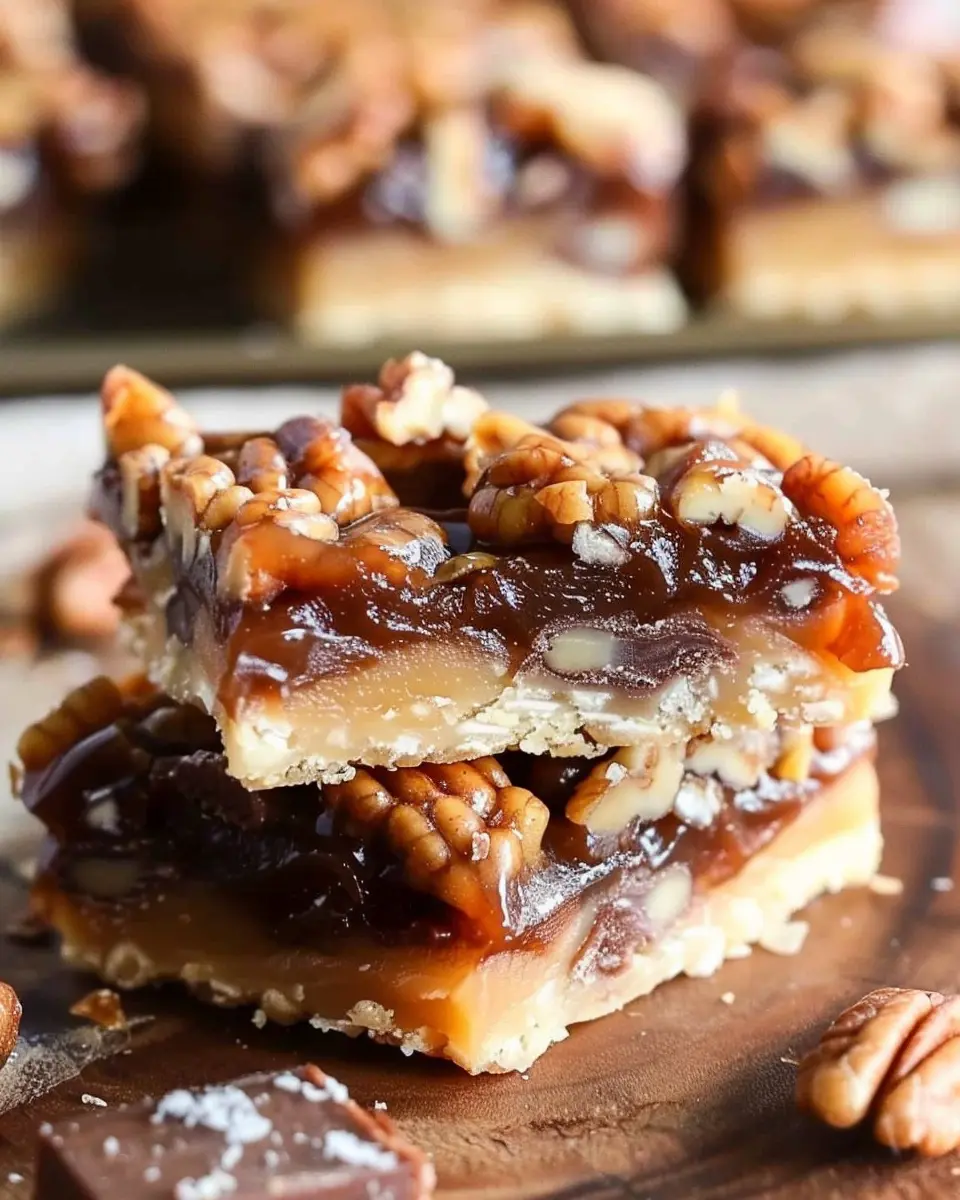
When you think of a dessert that captures the essence of indulgence, look no further than turtle bars. These delightful treats combine layers of rich chocolate, buttery caramel, and crunchy nuts to create a symphony of flavors and textures. For young professionals constantly on-the-go, turtle bars are not just a sweet escape; they’re a culinary moment that can elevate your day.
Why Turtle Bars are a must-try for young professionals?
As busy individuals navigating the demands of work, social life, and personal commitments, it's essential to have quick, satisfying treats that fit seamlessly into your routine. Turtle bars offer a perfect solution:
-
Quick to Make: Whether you want to whip them up for a last-minute gathering or for a personal treat, the preparation is straightforward and doesn't require extensive baking skills.
-
Portable Sweetness: These bars are easy to package and take with you, making them ideal for sharing with colleagues at the office or enjoying during a picnic in the park. Imagine biting into a rich layer of chocolate while taking a break on your lunch hour!
-
Versatile Ingredients: You can customize turtle bars to your taste preferences. Whether you prefer dark chocolate, milk chocolate, or even a hint of sea salt, the recipe is flexible. Plus, incorporating different nuts can add a unique twist.
-
Budget-Friendly: Creating these decadent bars at home is often more economical than purchasing desserts from high-end bakeries. You’ll save money while impressing friends with your culinary skills.
Ready for an adventure in baking? These bars not only taste fantastic but also fill your kitchen with the warm, inviting aroma of melted chocolate and caramel. If you need a reference point, the kitchn offers amazing insights into baking with caramel that might inspire your own turtle bar creation!
As you embark on this culinary journey, remember to have fun and enjoy the process! With just a few ingredients, you can create a delightful treat that's sure to bring smiles to those around you. So gather your supplies, and prepare for a deliciously rewarding experience with turtle bars!
Ingredients for Turtle Bars
What you'll need to create your delightful turtle bars
Making delectable turtle bars requires just a handful of ingredients, but the result is a decadent treat that anyone will love. Here’s your shopping list to whip up these yummy bars:
- Graham Cracker Crumbs: About 1 ½ cups, these will provide the sweet and crunchy base.
- Butter: You’ll need ½ cup, melted. This binds the crust and adds richness.
- Brown Sugar: A cup of packed brown sugar for caramel goodness—who can resist that?
- Evaporated Milk: 1 can (12 oz) is essential for that creamy texture in the filling.
- Chocolate Chips: Go for 1 cup of semi-sweet chocolate chips, perfect for that classic chocolate layer.
- Pecans: Roughly chopped, about 1 cup. They add that irresistible crunch and nutty flavor.
These turtle bars are not just easy to make; they’re a crowd-pleaser, perfect for gatherings or a cozy night in. Curious about how to bring out the best flavors? Check out Food52 for more tips!
For a similar treat, consider trying different nut combinations or even a drizzle of caramel. The possibilities are endless! So, let’s get baking!
Preparing Turtle Bars
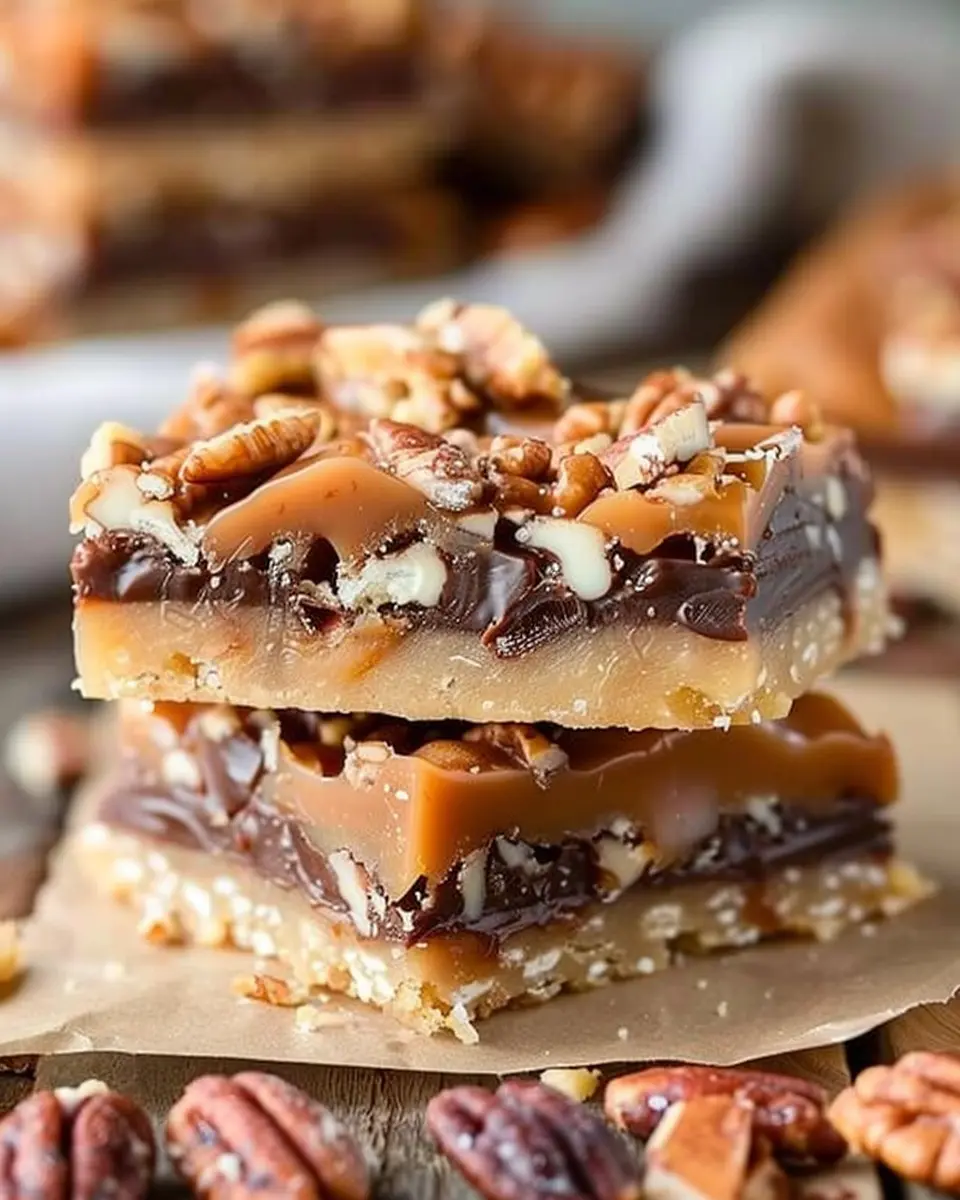
If you’re looking to impress your friends with a delicious treat, turtle bars are an excellent choice. They're a delightful combination of buttery shortbread, creamy caramel, and rich chocolate. Let's walk through each step to create these sweet, gooey squares that everyone will love.
Gather and prep your ingredients
Before diving into the baking process, it’s crucial to get organized. Here’s what you’ll need:
-
For the shortbread crust:
-
1 cup of unsalted butter, softened
-
2 cups of all-purpose flour
-
½ cup of granulated sugar
-
¼ teaspoon of salt
-
For the caramel layer:
-
1 cup of caramel candies (unwrap beforehand)
-
¼ cup of heavy cream
-
1 cup of chopped nuts (pecans or walnuts work great)
-
For the chocolate topping:
-
1 cup of semi-sweet chocolate chips
-
1 tablespoon of vegetable oil
Take a moment to measure everything out so you can mix and bake without interruptions. Having everything at your fingertips makes the process much smoother, and it’s well worth the effort!
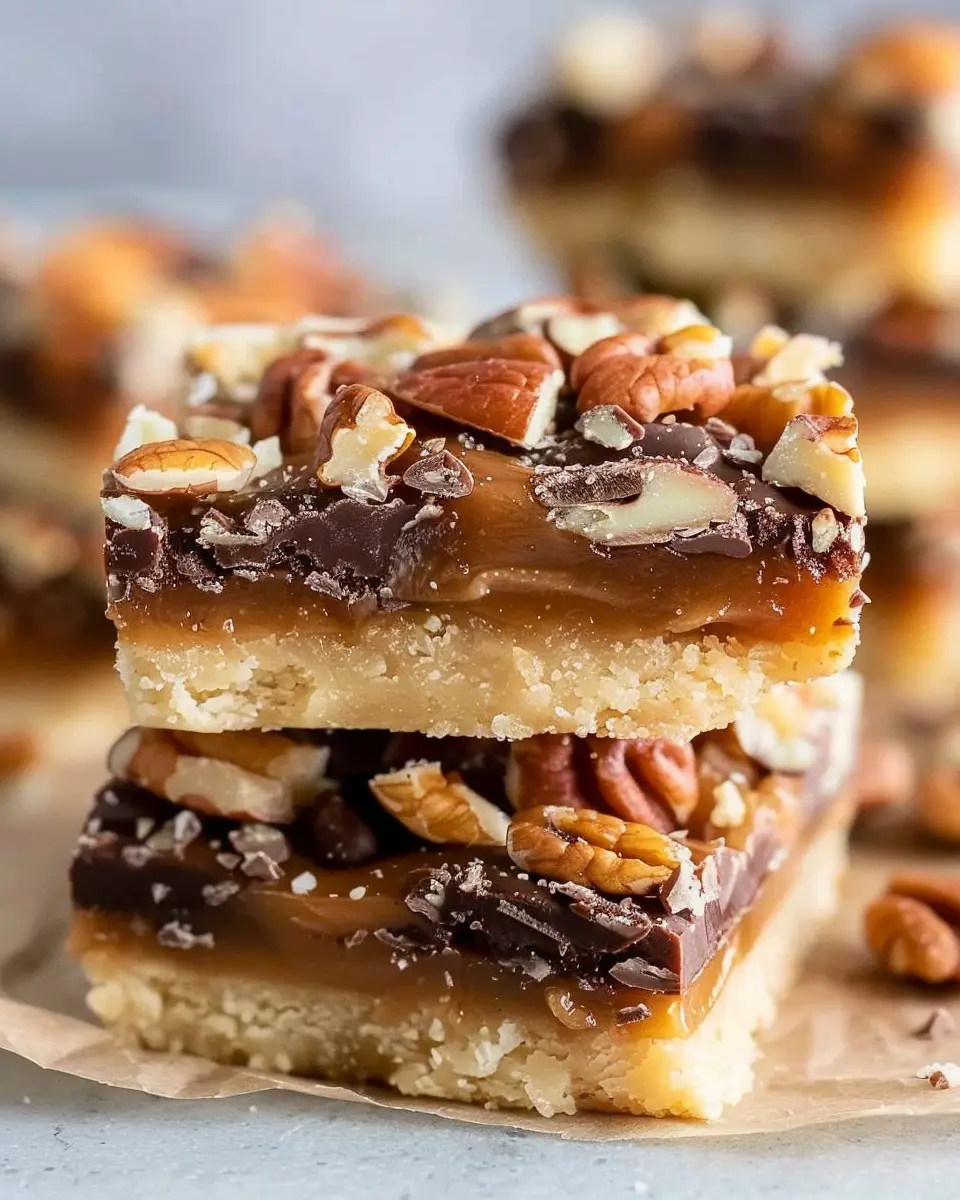
Create the shortbread crust
Now it’s time to make the foundation of your turtle bars. In a large mixing bowl, beat the softened butter and sugar together until the mixture becomes light and fluffy. This can take about 3–4 minutes.
Next, mix in the flour and salt until fully combined. The dough will be crumbly, but that’s normal! Press it evenly into a greased 9x13 inch baking pan, making sure it covers the bottom completely. This crust is what will hold all that deliciousness together!
Make the caramel layer
With your crust set, let’s turn our attention to the luscious caramel layer. In a small saucepan over medium heat, combine your unwrapped caramel candies and heavy cream. Stir continuously until the caramels melt into a smooth mixture. This part is crucial—if you rush, you might end up with lumpy caramel (not ideal for turtle bars).
Once melted, stir in your chopped nuts and pour this caramel concoction over the cooled shortbread crust. Spread it out evenly; a spatula works wonders here. This layer is honestly one of the most satisfying parts of the recipe!
Assemble the turtle bars
What’s a turtle bar without chocolate? After your caramel layer has set for about 10 minutes (so it’s not too hot), melt chocolate chips with a tablespoon of vegetable oil in the microwave in 30-second increments. Stir until smooth and glossy.
Once melted, pour the chocolate over the caramel and nut layer, spreading it evenly to cover all those flavors. Now, you can really make these bars your own! You could sprinkle some extra chopped nuts or even a pinch of sea salt on top if you're feeling adventurous.
Bake to gooey perfection
Preheat your oven to 350°F (175°C). Now, pop the baking pan in the oven and let it bake for about 20–25 minutes until everything is bubbly and golden. The aroma will be absolutely intoxicating!
Once done, remove the pan from the oven and let it cool entirely before cutting into squares. It’s tempting to dive in right away, but allowing them to set will give the bars a better texture and make them easier to slice.
After following these steps, you’ll have scrumptious, gooey turtle bars that are sure to be a hit. Always remember, the best sweets come from the heart—share them with those you love! For more dessert ideas, check out Taste of Home for inspiration!
Variations on Turtle Bars
Decadent Turtle Brownies
If you’re a fan of rich, chocolatey desserts, try your hand at turtle brownies. This variation takes everything you love about classic turtle bars but combines it with fudgy brownies. Here’s how to make them:
- Ingredients: Brownie mix, chocolate chips, pecans, caramel sauce, and salt.
- Instructions: Prepare the brownie mix as directed on the box. Once baked, drizzle warm caramel on top, sprinkle with chocolate chips and chopped pecans, then return to the oven for a few minutes. The result? Ooey-gooey goodness that blends turtle flavors with brownie decadence!
This recipe is perfect for dinner parties or cozy nights in, allowing you to wow your guests with minimal effort.
Easy No-Bake Turtle Bars
Short on time but still craving that delicious turtle bar experience? No worries! No-bake turtle bars are the answer. Not only are they quick to whip up, but they also deliver those signature chewy, crunchy, and gooey textures in every bite.
Here’s a simple recipe to get you started:
- Ingredients: Crushed graham crackers, melted butter, chocolate chips, caramel sauce, and chopped nuts.
- Instructions: Combine crushed graham crackers and melted butter, then press into a pan. Drizzle with chocolate and caramel sauces, sprinkle with nuts, and pop it in the fridge until set. Slice, serve, and watch them disappear!
With these variations, you can enjoy the classic flavors in a way that fits your mood or occasion, whether you’re entertaining guests or simply satisfying a sweet tooth. For more dessert inspiration, check out Food Network or The Kitchn.
Cooking tips and notes for Turtle Bars
Perfecting the caramel
Creating the perfect caramel for your turtle bars is essential. Start by using a heavy-bottomed saucepan to ensure even heating. Keep an eye on the heat; too high can quickly lead to burnt sugar. Stir constantly as the sugar dissolves and watch for that rich amber color—this indicates it’s ready! If you’re unsure, consider using a candy thermometer; 240°F is the magic number for soft-ball stage caramel. For a delicious twist, you can add a pinch of sea salt to elevate the flavors.
Storage tips for freshness
To keep your turtle bars fresh, it's best to store them in an airtight container at room temperature. Separate layers with parchment paper to prevent sticking. If you're making these treats in advance, consider freezing them! Just wrap individual bars in plastic wrap and then place them in a zip-top freezer bag. When you're ready to enjoy, simply let them thaw at room temperature. This way, you'll always have a delightful sweet treat on hand! For more storage tips and ideas, check out resources like Food Network for insights on keeping desserts fresh longer.
Serving suggestions for Turtle Bars
Pairing with beverages
When you think of turtle bars, imagine the warm, gooey goodness of caramel dancing with rich chocolate and crunchy nuts. To elevate this delightful dessert, consider serving it with a decadent hot cocoa garnished with whipped cream and a sprinkle of sea salt. The creaminess of the cocoa complements the flavors in the bars beautifully. If you're in the mood for something fizzy, a sparkling apple cider can add a refreshing twist.
You could also brew a strong cup of coffee, perhaps a dark roast or a flavored one like hazelnut, which will cut through the sweetness of your turtle bars. Check out this guide on coffee pairings to find the perfect match.
Presentation ideas for a cozy gathering
Hosting a cozy get-together? Make your turtle bars the star of the dessert table. Consider slicing them into bite-sized squares and arranging them on a beautiful wooden board, sprinkled with chopped pecans and a drizzle of caramel sauce for that extra touch. Enhance the vibe using small, rustic plates for serving, which create an inviting and homey atmosphere.
Add some seasonal flair by surrounding the bars with autumn leaves or fresh flowers to reflect the season if you’re entertaining in fall. Incorporating these little details not only makes your dessert the visual focal point but also stirs up a warm, comforting feeling among your guests.
Time breakdown for Turtle Bars
Preparation time
Making Turtle Bars is both quick and rewarding! You'll need approximately 15 minutes to gather your ingredients and prepare the baking dish. This brief prep time allows you to enjoy the anticipation of those delicious bars coming together.
Baking time
Once your ingredients are mixed and ready, you'll pop your Turtle Bars into the oven for about 25–30 minutes. This is the perfect window to clean up your kitchen or relax with a good book while the sweet aromas fill your home.
Total time
In total, you’re looking at around 45 minutes from start to finish. With such a minimal time commitment for a delightful treat, you might find yourself making these Turtle Bars more often than you think! Why not invite friends over for a baking session? You can find great tips on hosting fun baking nights through sources like The Kitchn.
Happy baking!
Nutritional facts for Turtle Bars
Calories per serving
Turtle bars are a delightful treat that doesn’t skimp on flavor. Each serving typically contains around 250-300 calories, making them an indulgent addition to your dessert lineup. While they might seem a bit decadent, these bars can fit well into a balanced diet when enjoyed in moderation.
Sugar and fat content
When it comes to sugar and fat, turtle bars usually pack a punch. You can expect about 20-25 grams of sugar and around 15-20 grams of fat per serving. This combo comes from the rich caramel, chocolate, and nuts that make these bars so delectable. If you’re looking for a satisfying sweet without blowing your daily intake, consider pairing a turtle bar with a cup of herbal tea for balance.
For more insights on dessert options, check out the USDA's dietary guidelines, which can help you make informed choices for your snacking habits.
FAQs about Turtle Bars
Can I use different nuts for turtle bars?
Absolutely! While traditional turtle bars often include pecans for that crunchy texture, you can switch it up based on your taste. Walnuts, almonds, or even cashews would create a delightful variation. If you're feeling adventurous, try mixing different nuts for a unique flavor experience. Just remember to chop them to a manageable size to integrate them seamlessly into your bars.
How do I store leftover turtle bars?
To keep your turtle bars fresh and tasty, storing them properly is key. Place them in an airtight container at room temperature if you plan to consume them within a week. For longer storage, consider freezing them. Just wrap each bar in plastic wrap and place them in a freezer-safe bag. They can last up to three months in the freezer! Simply thaw them at room temperature or pop them in the microwave for a few seconds before enjoying.
Can I substitute ingredients for dietary needs?
Of course! Many people have various dietary requirements, and turtle bars can be quite accommodating. If you need a gluten-free option, substitute regular flour with almond or coconut flour. For a vegan twist, use a plant-based substitute for butter and opt for dairy-free chocolate. If you’re watching your sugar intake, sugar alternatives like stevia or erythritol can be great substitutes as well.
Feel free to explore and make the recipe work for you! For more in-depth information on ingredient substitutions, check out this helpful guide from Healthline.
Conclusion on Turtle Bars
Final thoughts on Turtle Bars
Turtle bars are truly a dessert lover's dream! With their delightful layers of chocolate, caramel, and crunchy pecans, these treats are both indulgent and satisfying. Whether you’re whipping them up for a special occasion or just treating yourself, they never disappoint.
I’d love to hear about your turtle bars baking adventures! Did you add any unique twists to the recipe, or perhaps have a memorable gathering where they stole the show? Feel free to share your experiences in the comments, as we can inspire one another in the kitchen. For more tips and insights, check out resources like the American Culinary Federation for professional advice on creating the perfect dessert. Happy baking!
PrintTurtle Bars: Indulge in These Easy, Chewy Chocolate Delights

Turtle Bars are the perfect combination of chewy, chocolatey goodness topped with rich caramel and pecans. These treats are easy to make and are sure to satisfy your sweet tooth!
- Prep Time: 15 minutes
- Cook Time: 30 minutes
- Total Time: 45 minutes
- Yield: 24 bars
- Category: Dessert
- Method: Baking
- Cuisine: American
- Diet: Vegetarian
Ingredients
- 1 cup unsalted butter
- 1 cup brown sugar
- ½ cup granulated sugar
- 2 cups all-purpose flour
- 1 cup chocolate chips
- 1 cup chopped pecans
- 1 cup caramel sauce
Instructions
- Preheat your oven to 350°F (175°C).
- In a mixing bowl, cream together the butter, brown sugar, and granulated sugar until fluffy.
- Mix in the flour until a dough forms.
- Press the dough evenly into a greased baking pan.
- Bake for 15-20 minutes or until just golden.
- Remove from the oven and immediately sprinkle the chocolate chips and pecans over the hot crust.
- Drizzle caramel sauce on top and return to the oven for an additional 10 minutes.
- Allow to cool before cutting into bars.
Notes
- For a richer flavor, use dark chocolate chips.
- These bars can be stored in an airtight container for up to a week.
Leave a Reply